Flutter Custom Shape를 알아보자
내 마음대로 만들어보는 CustomShape 도형들
이전에도 말했듯이 모바일 개발자로써 디자인에 대한 갈망이 있다.
어떻게하면 조금더 기깔나게 만들수 있을까? 라는 생각이 가장 크다.
그게 내가 모바일 개발자가 되고 싶었던 이유였으니까.
그러던 중 오픈카톡방에서 쿠로곰님이 아티클을 정리해서 올려주신 글을 봤는데 딱 눈에 들어온 Medium 글이 있었다.
Mastering Shapes and Clipping in Flutter 라는 제목을 가졌는데 글을 보자마자 뭐야 너무 내맘에 쏙이잖아 라는 생각이 들었다.
게다가 이번 Future
와 저 모양을 저렇게 만들수도 있구나 느끼면서 저렇게 창의적으로 디자인 사항을 반영해보고 싶었던 부분도 컸던것 같다.
나였으면 그냥 이미지를 넣지 않았을까? 라고 생각한 부분도 컴포넌트화를 하고 해당 도형이 어디서든 쓰일수 있도록 하셨던 부분에 대해서 반성을 하게 되었다.
그래서 이번에는 이런 도형을 만들어보고 어떻게 쓰일수 있을지 알아보고자 한다.
1. Shape 와 Box 란?
Shape: Path로 정의된 어떤 형태를 의미한다.
Box: 4개의 점으로 구성된 직사각형 모양을 나타냅니다. 추가로 borderradius 같은 속성을 가질 수 있다.
Flutter에서는 여러 컨텍스트에서 Box가 사용된다:
- RenderBox: 위젯의 레이아웃과 페인팅을 담당
- BoxDecoration: 배경색, 테두리, 그림자 등을 정의
- BoxBorder: 테두리 스타일을 정의
- ShapeDecoration: 커스텀 형태의 장식을 정의
- ShapeBorder: 테두리의 형태를 정의
이러한 요소들은 주로 Container, DecoratedBox 등의 위젯을 스타일링하는 데 사용된다.
특히 BoxDecoration은 가장 일반적으로 사용되며, 간단한 스타일링에 적합하다.
1.1 기본적인 Box 구현
1
2
3
4
5
6
7
8
9
10
11
Widget _item1() {
  return DecoratedBox(
    decoration: ShapeDecoration(
      color: Color(0xFFd6f5ff),
      shape: BeveledRectangleBorder(borderRadius: BorderRadius.circular(20))
          .lerpTo(
          BeveledRectangleBorder(borderRadius: BorderRadius.circular(1)), 0.4)!,
    ),
    child: const SizedBox(height: 200, width: 200),
  );
}
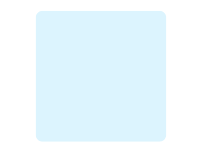
여기서 BeveledRectangleBorder는 모서리가 깎인 사각형을 만드는 위젯이다.
lerpTo 메서드를 사용하면 두 개의 다른 모양 사이를 보간할 수 있다.
lerpTo(ShapeBorder? b, double t) 이런식으로 생겼는데 ShapeBorder 우리가 자주 사용하던 ShapeBorder를 넣어주면 되고 그 뒤에 t는 보간을 나타낸다.
0은 시작 모양 즉 BeveledRectangleBorder 팔각형이 나타나고,
1은 끝 모양을 의미한다. 1을 넣으면 직사각형이 나타난다.
이를 통해 두 모양의 중간 형태를 만들 수 있다.
1.2 일반적인 둥근 모서리 Box
1
2
3
4
5
6
7
8
9
10
Widget _item2() {
  return DecoratedBox(
    decoration: BoxDecoration(
      borderRadius: BorderRadius.circular(10),
      shape: BoxShape.rectangle,
      color: Color(0xFFd6f5ff),
    ),
    child: const SizedBox(height: 200, width: 200),
  );
}
BoxDecoration은 Flutter에서 가장 일반적으로 사용되는 위젯이다.
borderRadius로 모서리의 둥글기를 정할 수 있으며, shape으로 기본 형태를 설정할 수 있다.
BoxShape.rectangle은 사각형 형태를 의미한다.
1.3 ShapeDecoration을 활용한 특별한 모양
1
2
3
4
5
6
7
8
9
10
11
Widget _item3() {
  return DecoratedBox(
    decoration: ShapeDecoration(
      color: Colors.amber,
      shape: BeveledRectangleBorder(
        borderRadius: BorderRadius.circular(20)
      ),
    ),
    child: const SizedBox(height: 200, width: 200),
  );
}
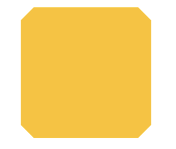
ShapeDecoration은 BoxDecoration보다 더 다양한 형태를 구현할 수 있다.
BeveledRectangleBorder를 사용하면 모서리가 대각선으로 깎인 8각형 형태를 만들 수 있다.
1.4 미리 정의 된 모양을 사용
1
2
3
4
5
6
7
8
9
Widget _item4() {
  return DecoratedBox(
    decoration: ShapeDecoration(
      shape: StarBorder(),
      color: Colors.amber,
    ),
    child: const SizedBox(height: 100, width: 100),
  );
}
Flutter는 StarBorder와 같은 미리 정의된 도형들을 제공한다.
이러한 도형들은 별도의 복잡한 구현 없이도 특별한 모양을 쉽게 만들 수 있게 해준다.
물론 나도 처음 써본다..!
2. 커스텀 ShapeBorder 구현하기
메시지 버블 형태의 커스텀 도형을 만들어보자
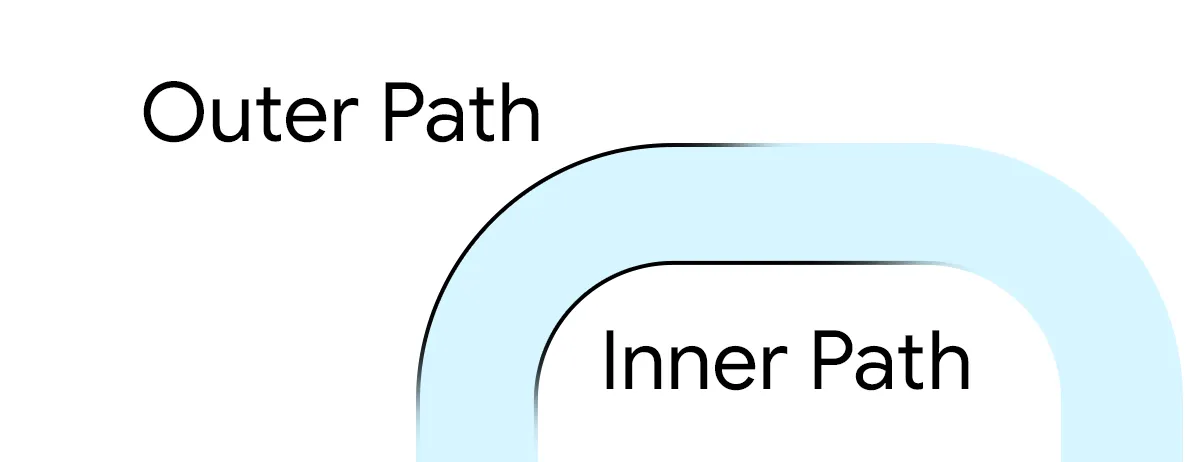
우선 OutlinedBorder를 extends 해서 사용하기 위해선
getInnerPath, getOuterPath, pain, scale, copyWith 가 필요하다.
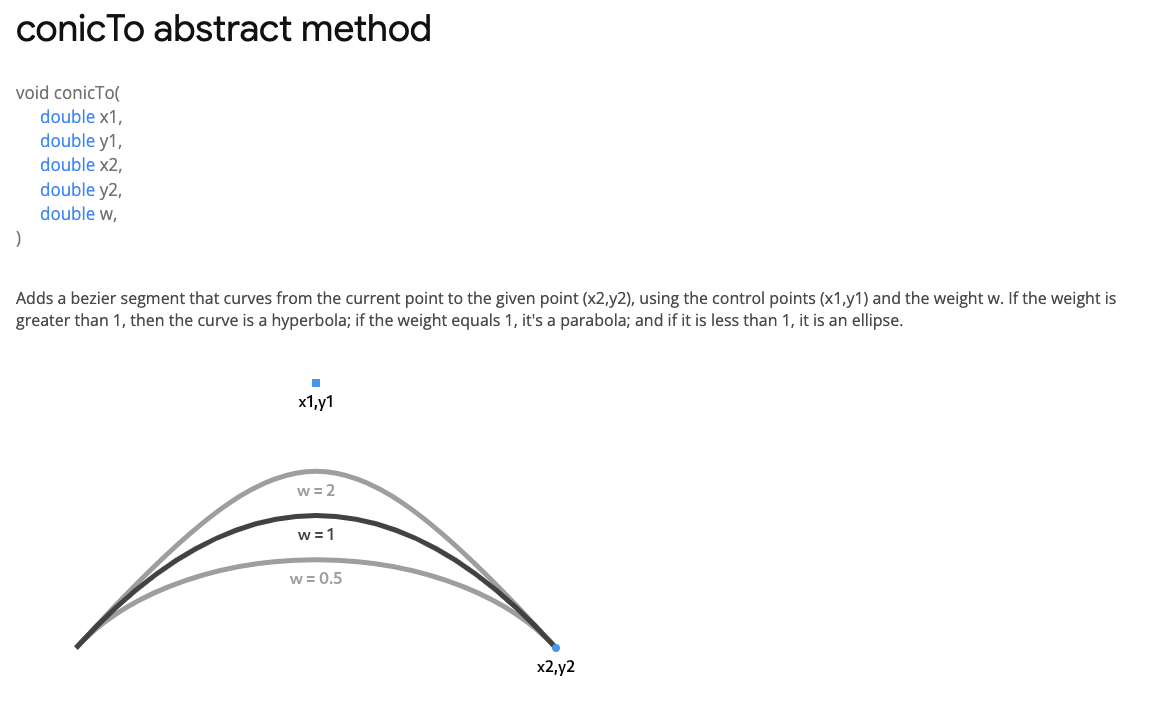
우선 weight를 이용해서 곡선의 정도를 나타낼 수 있다.
이 weight 들은 conicTo의 파라미터로 사용된다.
1
2
3
4
5
6
7
8
9
10
11
12
13
14
15
16
17
18
19
20
21
22
23
24
25
26
27
28
29
30
31
32
33
34
35
36
37
38
39
40
41
42
43
44
45
46
47
48
49
50
51
52
53
54
55
56
57
58
59
60
61
62
63
64
65
66
67
class MessageShapeBorder extends OutlinedBorder {
  final double borderRadius;
  final double weight;

  const MessageShapeBorder({super.side, this.borderRadius = 50, this.weight = 2.5});

  @override
  Path getInnerPath(Rect rect, {TextDirection? textDirection}) {
    final strokeWidth = side.width;

    final double left = rect.left + strokeWidth;
    final double right = rect.right - strokeWidth;
    final double top = rect.top + strokeWidth;
    final double bottom = rect.bottom - strokeWidth;

    final radius = math.max(0, borderRadius - 10);
    final offset = 10;

    return Path()
      ..moveTo(left + offset + radius, bottom)
      ..conicTo(left + offset, bottom, left + offset, bottom - 2 * radius, weight)
      ..lineTo(left + offset, top + radius)
      ..conicTo(left + offset, top, left + offset + radius, top, weight)
      ..lineTo(right - radius, top)
      ..conicTo(right, top, right, top + radius, weight)
      ..lineTo(right, bottom - radius)
      ..conicTo(right, bottom, right - radius, bottom, weight)
      ..close();
  }

  @override
  Path getOuterPath(Rect rect, {TextDirection? textDirection}) {
    final double left = rect.left;
    final double right = rect.right;
    final double top = rect.top;
    final double bottom = rect.bottom;

    final radius = borderRadius;
    final offset = 10;

    return Path()
      ..moveTo(left, bottom)
      ..conicTo(left + offset, bottom - offset, left + offset, bottom - 2 * radius, weight)
      ..lineTo(left + offset, top + radius)
      ..conicTo(left + offset, top, left + offset + radius, top, weight)
      ..lineTo(right - radius, top)
      ..conicTo(right, top, right, top + radius, weight)
      ..lineTo(right, bottom - radius)
      ..conicTo(right, bottom, right - radius, bottom, weight)
      ..close();
  }

  @override
  void paint(Canvas canvas, Rect rect, {TextDirection? textDirection}) {
    canvas.drawPath(getInnerPath(rect), Paint()..color = side.color);
  }

  @override
  ShapeBorder scale(double t) {
    return this;
  }

  @override
  OutlinedBorder copyWith({BorderSide? side}) {
    return this;
  }
}
이 커스텀 MessageShapeBorder는
weight파라미터로 곡선의 둥글기를 조절할 수 있다borderRadius로 모서리의 전체적인 둥글기를 설정할 수 있다conicTo메서드로 부드러운 곡선을 그릴 수 있다
사실 직접 구현하면서 각 라인의 동작을 보기전 까지는 크게 와닿지 않을수 있다.
물론 나도 그랬고, 하지만 실제로 라인바이 라인으로 conicTo, lineTo 를 넣어보면서 구현해 보면 쉽게 이해할수있다.
2.1 메시지 버블 활용 예시
1
2
3
Widget _item5() {
  return MessageBubble(text: "메세지다 야호야호");
}
2.2 메시지 버블 활용 예시
1
2
3
4
5
6
7
8
9
10
11
12
Widget _item6() {
  return DecoratedBox(
    decoration: ShapeDecoration(
      shape: MessageShapeBorder(
        borderRadius: 50,
        side: BorderSide(width: 0, color: Color(0xFF7ADEFF))
      ),
      color: Color(0xFF7ADEFF),
    ),
    child: SizedBox(width: 500, height: 200),
  );
}
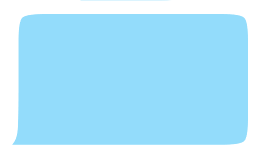
커스텀 MessageShapeBorder를 사용하여 채팅 버블과 같은 모양을 만들 수 있다.
borderRadius와 side 속성으로 테두리의 스타일을 조절할 수 있다.
2.3 이미지 클리핑 예시
1
2
3
4
5
6
7
8
9
10
11
12
13
14
Widget _item7() {
  return ClipPath(
    clipper: const ShapeBorderClipper(
      shape: MessageShapeBorder(),
    ),
    child: Image.asset(
      "assets/tt.jpeg",
      height: 200,
      width: 300,
      fit: BoxFit.cover,
      cacheHeight: (300 * MediaQuery.of(context).devicePixelRatio).toInt(),
    ),
  );
}
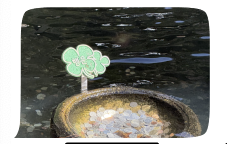
ClipPath와 ShapeBorderClipper를 사용하면 이미지를 원하는 형태로 잘라낼 수 있다.
여기서는 우리가 만든 MessageShapeBorder를 사용하여 이미지를 메시지 버블 형태로 잘라낸다.
2.4 quadraticBezierTo의 사용
quadraticBezierTo 는 나도 처음들어봤다.
예제에 있어 구현하면서 공부해봤다.
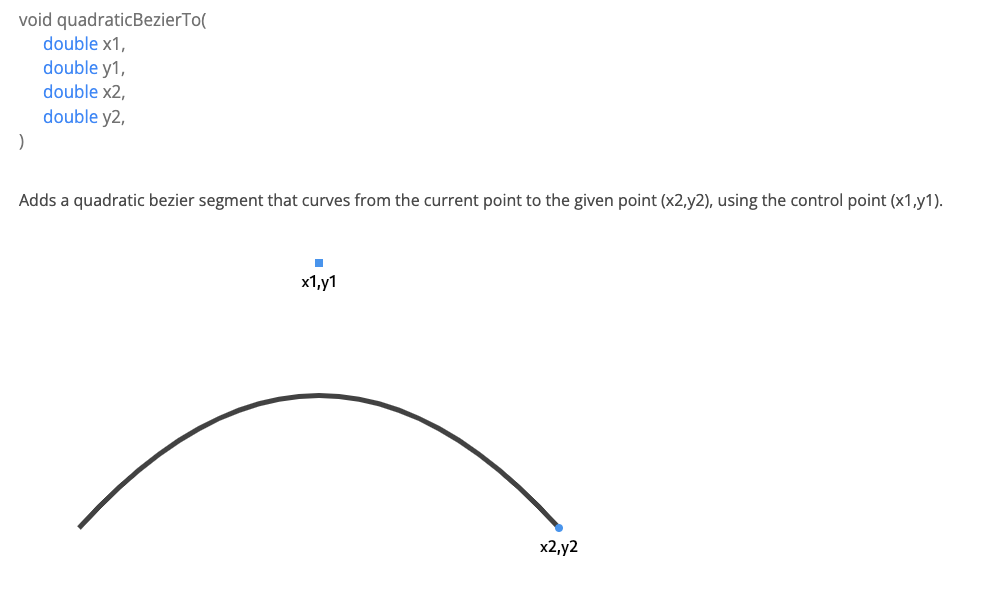
공식문서 에는 다음과 같이 나타나 있다.
이걸 어떻게 사용할 수 있을까?
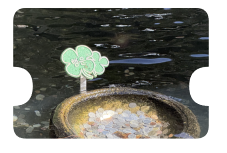
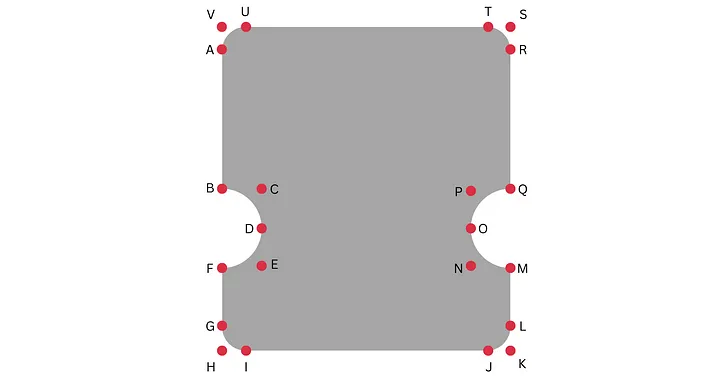
예를 들어 다음과 같은 모양을 만든다고 해보자
그러면 일단
다음과 같은 사각형을 만들고 path를 통해서 도형을 하나씩 깍아 나가야 될 것이다.
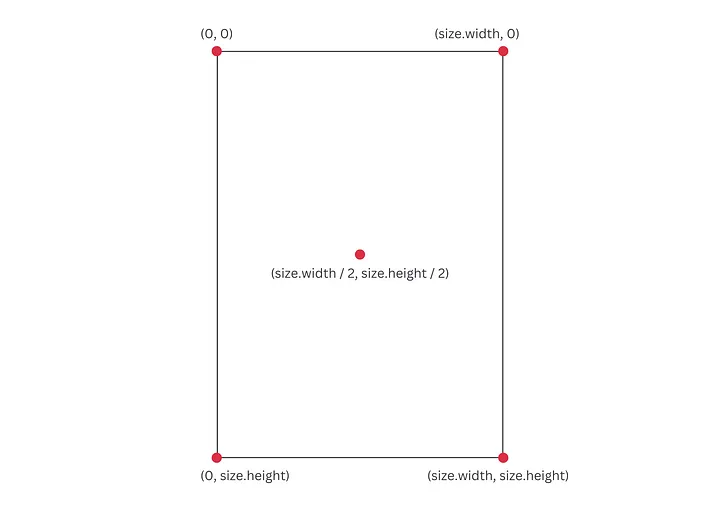
moveTo(double x, double y)를 통해서 이동 시켜주고 lineTo(double x, double y)를 통해서 선을 그려주고 quadraticBezierTo(double cp_x, double cp_y, double x, double y) 곡선을 그려줄 것이다.
그럼 다음처럼 여러방면에서 사각형을 깍아주어야한다.
quadraticBezierTo 사용하는 제어점은 cp_x, cp_y 라고 생각하면 된다.
- A로 이동
- B까지 선을 그어준다
- 제어점을 C로 잡고 D까지 곡선을 그려준다
- 제어점을 E로 잡고 F까지 곡선을 그려준다
- G까지 선을 이어준다
- 제어점을 H로 잡고 I까지 곡선을 그려준다
- J까지 선을 그어준다
- 제어점을 K로 잡고 L까지 곡선을 그려준다
- M까지 선을 그어준다
- 제어점은 N으로 잡고 O까지 곡선을 그려준다 11.제어점을 P로 잡고 Q까지의 곡선을 그려준다
- R까지 선을 그어준다
- 제어점은 S로 잡고 T까지의 곡선을 그려준다
- U까지 가는 선을 그어준다
- 제어점을 V로 잡고 A까지의 곡선을 그려준다
- path를 close 해준다
1
2
3
4
5
6
7
8
9
10
11
12
13
14
15
16
17
18
19
20
21
22
23
24
25
26
27
28
29
30
31
32
33
34
35
36
37
38
39
40
41
42
43
44
45
46
47
48
49
50
51
52
53
54
55
56
57
58
59
60
61
62
class CardItem extends CustomClipper<Path> {
  @override
  Path getClip(Size size) {
    var path = Path();

    double sideRadius = 30.0;
    double midPoint = size.height * (3 / 5);
    double cornerRadius = 20.0;

    // 1. A로 이동
    path.moveTo(0, cornerRadius);
    // 2. B까지 선을 그어준다
    path.lineTo(0, (midPoint - sideRadius));
    // 3. 제어점을 C로 잡고 D까지 곡선을 그려준다
    path.quadraticBezierTo(sideRadius, midPoint - sideRadius, sideRadius, midPoint);
    // 4. 제어점을 E로 잡고 F까지 곡선을 그려준다
    path.quadraticBezierTo(sideRadius, midPoint + sideRadius, 0, midPoint + sideRadius);
    // 5. G까지 선을 이어준다
    path.lineTo(0, size.height - cornerRadius);
    // 6. 제어점을 H로 잡고 I까지 곡선을 그려준다
    path.quadraticBezierTo(0, size.height, cornerRadius, size.height);
    // 7. J까지 선을 그어준다
    path.lineTo(size.width - cornerRadius, size.height);
    // 8. 제어점을 K로 잡고 L까지 곡선을 그려준다
    path.quadraticBezierTo(size.width, size.height, size.width, size.height - cornerRadius);
    // 9. M까지 선을 그어준다
    path.lineTo(size.width, (midPoint + sideRadius));
    // 10. 제어점은 N으로 잡고 O까지 곡선을 그려준다
    path.quadraticBezierTo((size.width - sideRadius), (midPoint + sideRadius), (size.width - sideRadius), (midPoint));
    // 11.제어점을 P로 잡고 Q까지의 곡선을 그려준다
    path.quadraticBezierTo((size.width - sideRadius), (midPoint - sideRadius), size.width, midPoint - sideRadius);
    // 12. R까지 선을 그어준다
    path.lineTo(size.width, cornerRadius);
    // 13. 제어점은 S로 잡고 T까지의 곡선을 그려준다
    path.quadraticBezierTo(size.width, 0, size.width - cornerRadius, 0);
    // 14. U까지 가는 선을 그어준다
    path.lineTo(cornerRadius, 0);
    // 15. 제어점을 V로 잡고 A까지의 곡선을 그려준다
    path.quadraticBezierTo(0, 0, 0, cornerRadius);
    // 16. path를 close 해준다
    path.close();
    return path;
  }

  @override
  bool shouldReclip(CustomClipper<Path> oldClipper) => false;
}

Widget _item8() {
  return ClipPath(
    clipper: CardItem(),
    child: Container(
      child: Image.asset(
        "assets/tt.jpeg",
        height: 200,
        width: 300,
        fit: BoxFit.cover,
        cacheHeight: (300 * MediaQuery.of(context).devicePixelRatio).toInt(),
      ),
    ),
  );
}
아니 뭐가 이렇게 복잡하지…? 그래도 생긴 모양은 이쁘다 다음과 같이 도형을 하나하나 깍아서 이쁜 모양을 만들 수 있다.
내가 느낀 결론
CustomShape를 직접 구현해보면서 몇 가지 중요한 점을 깨달았다:
- 재사용성의 중요성:
- Future
에서 봤듯이 이런 도형들의 컴포넌트의 중요성을 한번 더 생각하게됐다. - 처음에는 단순히 이미지로 처리하고 싶었던 부분들도 컴포넌트화하니 여러 곳에서 활용할 수 있었다.
- 크기나 색상 등을 파라미터로 받아 유연하게 사용할 수 있다는 장점이 있다.
- Future
- 성능 최적화:
- 이미지 대신 코드로 그리는 것이 메모리 관리 면에서 효율적일 수 있다.
- 학습 곡선:
- Path API를 처음 다루는 것이 어려울 수 있지만, 한번 배워놓으면 유용하게 쓰인다!
- lineTo, conicTo 등의 메서드를 실제로 그려보면서 이해하는 것이 중요하다
앞으로도 단순히 디자인을 구현하는 것을 넘어서 재사용 가능하고 효율적인 컴포넌트를 만드는 것을 고민해야겠다.
미리 구현된 라이브러리 최고

